Thursday 16 May 2013

Nicole by OPI Let's Get Star-Ted

I was in my local pharmacy the other day and saw that they had some Nicole by OPI polishes on sale.  Now, never one to pass up on an OPI nail polish at the best of times, I purchased Let's Get Star-Ted.


This polish was really difficult to photograph in order to show you the true colours but I think the above photos are pretty representative of what it actually looks like.  It basically consists of large purple holographic stars as well as holographic micro-glitter suspended in a clear polish.
 
 
As with other nail polishes I have with large holographic/glitter pieces in them, application is a bit of a nuisance.  If you simply take the brush out of the bottle and apply to the nail as normal, all you will get on your nail is the micro-glitter. Otherwise you need to strategically ensure that the brush picks up some stars and place them on the nail, which also leaves you with a gloop of clear varnish to try and tidy up.  However, once applied it is very pretty, and I thought I would show you where I applied it generously on one of my nails:


To be honest, considering the price of these polishes (around €14.99), I won't be purchasing another. I think if you went into a craft shop and bought little holographic stars, it would be easier and much cheaper to apply them to your nail and cover with a top coat, rather than messing about with this!

Have any of you tried similar polishes? Let me know how you got on with them!

Wednesday 15 May 2013

Broadway Nails Press On Manicure

Hi there!  So are any of you like me, where you like to wear false nails for special occasions but find faffing around with nail glue annoying, not to mention damaging to your natural nails?  `Well today I want to show you Broadway Nails imPress Press On Manicure


While I do like a French manicure, I purchased these in the colour 'High Hopes' which is a nude pink colour.  Broadway claim that this is an instant manicure with easy application, no drying time, and easy removal, and I have to say I agree with them on all of those claims! Each nail has adhesive already on it which is covered by a tabbed sticker which looks like this:


To apply each nail, you peel away the sticker, align the false nail to your cuticle and press down firmly all over the nail - simple as that!  Application literally took me 5 minutes, and this was the finished result


I love the look of these, they are so natural looking - a few people asked me what nail polish I was wearing so that says a lot! I have removed them now and they are so easy to remove, just use an orange stick or whatever else you have to hand to help lift the edge of the nail off and they peel off fairly easily.  Now I know the big question I had over these nails was if the application and removal is so easy, how secure will they be on the nail?  I give them a 9/10 on that one! On one of my thumb nails, my cuticle is not in perfect condition and I found that the nail had a tendency to push against it when any pressure was applied to it which was a bit painful.  None of the other nails moved under pressure so I'm not sure if it was something to do with my application of the nail.

Overall I am very happy with these and I will use them again.  I would chose them over regular false nails with glue any day!  They cost around €8/9 or £6/7 depending on where you buy them and I know they are available in Penneys/Primark, as well as in pharmacies.

Wednesday 8 May 2013

Elizabeth Arden Prevage Clinical Lash and Brow Enhancing Serum

Hi guys! After a long time away from blogging due to personal circumstances I am back with a review of a product which has just amazed me over the past few weeks I have been using it.  That product is Elizabeth Arden's Prevage Clinical Lash and Brow Enhancing Serum.


 I had just been through a month or so of semi-permanent lashes which I loved but I felt my own lashes were falling out at a faster rate than ever before and needed some TLC.  I did a bit of research on other blogs and decided to splash out £75 on this.  It is an expensive product but I reasoned that a couple of applications of semi-permanent lashes cost the same amount!


The product comes with this velvet pouch to keep it in, which is unnecessary but a nice touch!  You apply it each night for 2 weeks like you would a liquid eyeliner along the base of your lashes.  All eye make up needs to be removed when you apply it.  So what were my results like?  The following are a couple of pictures of my lashes now having used this for 2 weeks:


I have mascara on in these photos just to give my lashes colour as they are quite fair at the ends even though I am dark haired! I wanted to give you close up images so that you can see the length and volume that my lashes have now.  I can actually see new, shorter lashes which are just growing now.  I am highly impressed by this product and even though it is expensive I feel it was worth every penny.  To maintain results you just use it once or twice a week and there is plenty in the product to last a long time.  I can't recommend it highly enough!

I will be putting up a blog sale tomorrow with some MAC, Benefit, Essie, OPI and more in it so please check back in for that!

Thursday 5 July 2012

PolarWhitePro Teeth Whitening

Hi guys! So for today's post I thought I would tell you about a teeth whitening product I have been trying out recently

Source: PolarWhitePro website

I had heard of PolarWhitePro Teeth Whitening Glaze and what caught my attention was the fact that you only needed to use it for a week in order to get results.  Then I came across it in my local pharmacy and I just had to pick it up!  I have very sensitive teeth and I found in the past that a lot of whitening products increase this sensitivity which is rather unpleasant.  Even so, I still thought I would give this a go and see how I got on!

These are the instructions for use:
  1. Brush teeth & wipe dry. Rotate pen at base to dispense gel;
  2. Hold a wide smile, keeping lips away from teeth during treatment;
  3. Apply a thin layer of gel to all teeth, ensuring coverage to entire tooth;
  4. Gel activates immediately on contact with teeth, you will notice slight foaming as it actively dissolves discolorations
  5. Allow 60 seconds to try. Do not rinse, gel remains active, slowly dissolving surface stains on teeth
  6. Refrain from eating or drinking for 30 minutes after application.
Although it is recommended to use this 2 to 3 times per day for a week, I only used it once a day, in the evenings (because I didn't have time in the mornings).  After a week of use, I definitely saw results where my teeth are about 2 shades whiter, and best of all I had no sensitivity whatsoever while using it! As far as teeth whitening goes, this is the best I have ever used.  The only drawback I can think of is I wouldn't be a fan of the taste it has, which I found a bit tacky, but that is down to personal preference!  I am going to go back and try to use it the recommended number of times per day again soon, but I'm just giving my teeth a couple of weeks break before I do!

It is available to buy from their website here at a cost of €24.95 with free shipping to Ireland and Northern Ireland, but I only paid €20 for it in my local pharmacy so have a look around!

Friday 1 June 2012

New Lip Purchases

Today I have 2 little bargains of lip products I picked up recently to show you!  First up is a gorgeous lipstick from MUA, one of their newer shades, Number 14 - Bare:


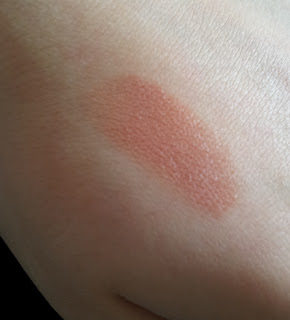
And a couple of swatches in different lights to show you the various tones to this colour:


This is a gorgeous nude shade, kind of a pink/beige colour with a hint of peach.  This is my second MUA lipstick and they really are excellent quality, especially for the price you pay.  They are lovely and moisturising while still being fairly pigmented, and although the staying power wouldn't be up there with the likes of MAC, that's certainly no big complaint when you are only paying £1/€1.35 for a lipstick!

Next I got one of the Collection 2000 Cream Puff Lip Creams in Powder Puff:


I'm not a big fan of lip glosses, I just can't bear the stickiness of them, but these creams are a nice alternative.  Again, they are really moisturising and quite pigmented and this is a similar shade to the MUA lipstick.  Here's some swatches of it alone and over the MUA lipstick:

Left, Cream Puff in Bare on its own; Right, over MUA Lipstick Shade 14

Thanks for reading guys!

I'm Back....

Hey guys,

I just wanted to write a quick post to say sorry for my long absence from the blogging world, and I'm back now.  I had really important interviews and exams to study for but it's all over and done with now and I have lots to blog about! Also want to say a big thank you for following and reading my blog!

:-) xx

Wednesday 21 March 2012

NOTD OPI Lincoln Park After Dark

Hi Guys!

Another OPI NOTD today! This is one of my favourite polishes from OPI, as I am a big fan of darker coloured nails.  This is a very dark, inky aubergine colour which looks practically black on the nails but when the light hits it you can see the reddish-purple tones through it.  The photos with the flash show this best.

Without Flash
With Flash

Close up with Flash
 As usual with OPI, this wears excellently.  The application of this is also brilliant - it's almost opaque with 1 coat but I always put on 2 coats anyway! Love it! :-)